
Are your students bored with the same field day activities year after year? Bring excitement back to field day with 5 DIY projects for the best field day ever!
Field Day is my students’ favorite day of the year, and I am right there with them! It’s a day full of fun, excitement and friendly competition. A celebration that summer is almost here and all of our hard work throughout the school year comes to an end.
Personally, I believe the wetter and messier the field day, the better! Many of my activities and stations are things I put together myself. Nothing too complicated you just have to be willing to put in a little time. So here are five of my favorite DIY projects for fun and engaging field day activities!
1. Jumbo Slip-N-Slide
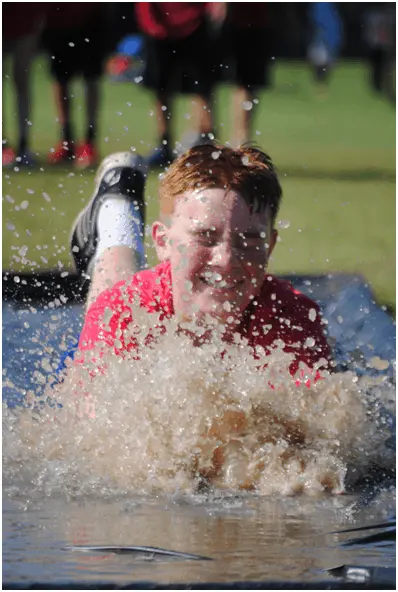

Jumbo Slip-N-Slide first made its appearance in my field day about 9 years ago. It’s super easy to assemble, and if done right, you can reuse it for next year! At my school, we have two Jumbo Slip-N-Slides in difference lengths, one for the lower grades, 1st-3rd that is about 25ft long and one for the older grades, 4th-8th that is about 35ft long.
Supplies:
- Pool Noodles, enough noodles to cover the perimeter of the slip-n-slide
- Heavy Plastic Sheeting (higher MIL the better, I used 6mil)
- Scissors
- Strong Duct Tape
- Medium Temp Glue Gun (optional)
Directions:
- Roll out your sheeting and decide what length you want your slip-n-slide to be. Add about 3 extra feet (to roll the ends in later) and cut away the excess.
- Lay out the pool noodles to full desired length of your slip-n-slide, leaving the extra footage evenly on each end to roll later.
- Secure the noodles end to end to create one really long noodle by using duct tape.
- Secure the noodle to the plastic sheeting with your glue gun or by using duct tape about every 3 ft.
- Roll the long noodle inward. Make sure you roll it in at least 2 feet. Use glue gun or duct tape to secure about every 3 ft. Repeat on the other side
- Tips: Seek out extra hands to help roll the noodle, keep the sheeting tight around the noodle, and remeber the more your roll, the narrower your slip-n-slide will be.
- Repeat the same process at each end of your slip-n-slide. When finished, it should look like a shallow pool.
- Seal and secure the entire slip-n-slide by using duct tape. Completely cover the inside perimeter of the slip-n-slide on the seams. Make sure you use duct tape all the way around the slip-n-slide, its important not to leave a gap where water can get in.
- Flip it upside down– this is the most important step! It took me years to figure that tip out, but by doing so, you should be able to get a couple years use out of the same slide.
- Add water, maybe a little baby oil, and let the fun begin!
2. Splash-A-Mole
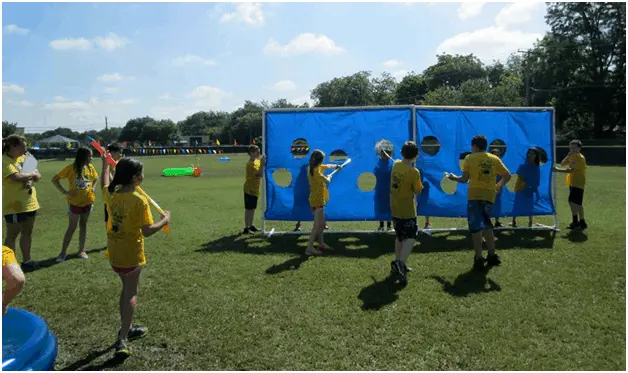
Splash-a-mole is super fun and super easy to build! It’s a watery twist to the popular arcarde game Whack-A-Mole. This activity made it’s grand appearance into our field day in 2014. I first saw a similar activity on PE Universe as a game called Gopher Splash by John Theiss. I’ve found a few tweaks I will be making for next year and will include those below.
Supplies:
- 6′ x 8′ Tarp
- Scissors
- Marker
- 5 Gal. Bucket Lid
- Zip-ties
- PVC Stand (supply list below)
- Lay out your tarp flat on the ground.
- Use a 5-gal bucket lid and maker to trace circles on the tarp. Make sure your circles are not too close together or near the edges.
- Cut out your circles.
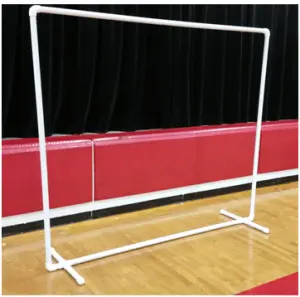
- Build your PVC pipe stand using the supplies below
- Attach tarp to stand with zip-ties
Directions:
PVC Pip Stand Supplies: (all pipes are 1 ¼”)
- 1- 92″ (Top Rail)
- 1- 82 ¼” (Bottom Rail)
- 2- 75 ½” (Side Rails)
- 4- 12″ (Foot Rails)
- 2- 2 ½” (Foot Rails)
- 4- Elbow Connectors
- 4- End Cap Connectors
- 2- Fout-Way Connectors

3. Giant Bubbles
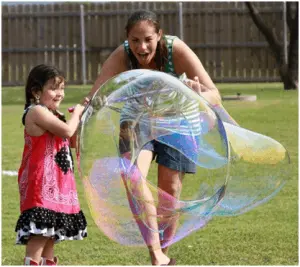
Bubbles can be entertaining for all ages, even if you’re not the one making the bubbles. The amazed look faces when a BIG bubble is being made makes my day.
Here are some helpful tips if you want to incorporate a Giant Bubble station at your next field day.
First, you need to know that the ideal weather conditions for giant bubbles are a humid and overcast day. I teach in Texas, so humidity is not a problem, but that hot Texas sun can be. I generally have more stations than classes on field day, so I always make sure my classes visit this station early on before the sun gets too hot. Afternoon field days might be a little tricky with a bubble station. I would recommend putting the bubble station in a nice shaded area, if possible.
Second, the secret to creating a solution that will make BIG bubbles is glycerin. Glycerin can be found in the pharmacy section at most stores. Another secret to bigger bubbles is allowing your solution to settle for at least an hour before the first use, overnight is even better.
Below you will find instructions to make your own bubble solution and large wands.
Supplies:
- 5-Gallons Distilled Water
- 12 Cups of Dawn Original Dish Soap
- 18oz Glycerin
- Kiddie Pool
- Butterfly Nets (from the Dollar Store is fine!)
- Scissors
Directions:
- Gently mix together the water, dish soap, and glycerin in a kiddie pool or other holding container
- Be careful not to create a lot of foam/froth when mixing the bubble solution. Also try to keep students from shaking or swirling the wands in the solution
- Cut bottoms off of butterfly nets. Leave some of the netting as it helps the solution stick to the butterfly net.
4. Snowball Fight
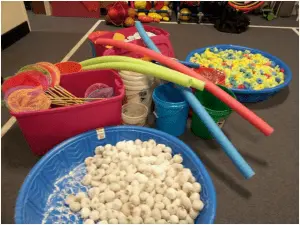
Snowball Fight is my absolute favorite field day station!
A snowball fight at the start of summer?? Yep, that’s right!!! Students throw snowballs at each other made from baking flour and panty hose. Messy? Yes. FUN? Oh yeah!
This DIY project can be time consuming, so the more hands on deck helping make the snowballs the better. I recommend making one snowball per student. The same snowball can be used over and over again until all the flour runs out. Each time the snowball is thrown a little flour comes out through the panty hose, leaving a white mark on your hit target.
Your students will love this DIY field day project. All you need are the supplies listed below and follow the simple directions on the video.
Supplies:
- Baking Flour
- Panty Hose (Knee Highs are easier to work with)
- Cup
- Scissors
5. Car Wash
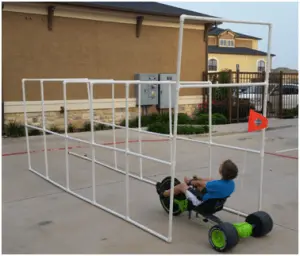
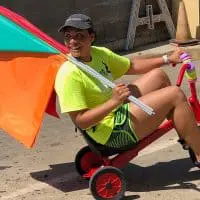
Creating things out of PVC pipes can be so easy! Check out this awesome car wash my eight year old son designed for our field day this year. I am so excited to see this in action. We order two large Viking Tricarts from Gopher for the students to ride on and go thru the car wash. So FUN! I am super stoked about these Tricarts too! They have been on my PE Equipment dream list for a couple of years now.
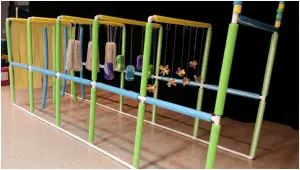
Below are pictures and all the items you need to put this awesome DIY field day project together.
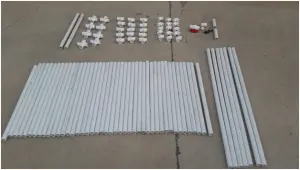
Supplies: (All PVC Pipes for this project are 1″)
- 36- 2½’ Pipes
- 7- 4′ Pipes
- 2- 1½ (Used at top front to hang sign)
- 8- Four-Way Connectors
- 15- T Connectors
- 15- Elbow Connectors
Using the picture above, piece together all your cut PVC pipes and connectors. We used PVC glue and glued each upside U section together, leaving the sidebars unglued to help with storage, as soon in the picture below.
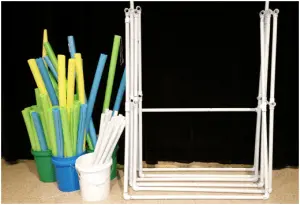
Water Valve Supplies and Assembly:
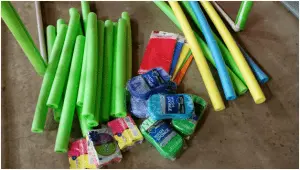


Once fully assembled, drill your holes using a 1/8th drill bit in your desired locations. We have some holes drilled on top crossbars to create a water curtain and some drilled on the sidebars for a side spray. Be careful not to over drill, so your water flow has enough pressure to go through all the pipes. That’s it; now you just add your decorations.
Suggested Decorations:
- Mop Heads
- LOTS of pool noodles
- Car sponges
- Regular sponges
- Plastic table cloth
- Heave duty string to hang items with
- Scissors or electric knife to cut noodles
You most certainly can cut some cost by not covering the pipes with noodles and just adding the center decorations. I wanted the “wow” factor and went the extra mile with ours.
To cover the pipes with noodles, I just used an electric knife (scissors would work too) to cut the noodle in half and then sliced long ways down one side of the noodle. To create the sponge balls, I cut sponges into 1” strips and layered 6 strips in a crisscross pattern and used string to tie them together in the middle. Really the sky is the limit when it comes to decorating.
Have fun building your DIY Carwash! I would love to see pictures!!
Create extra smiles this field day and try one of our DIY projects. I would love to hear about how it went. If you have a great DIY project yourself that you would like to share or have any questions, contact me sjarvis@standrewsch.org.
Check out these other great field day activities your students will love!




7 Responses
Some great, super fun ideas! Thank you. How do you play Splash-A-Mole?
Hi Penny! Sorry I didn’t see your comment until today. Please see below. Let me know if you have any more questions. Take Care!
What are the rules for your Splash A Mole? I would like to try it.
Hi Shari! Our students love this station on FD! See my comment and let me know if you have any more questions! Take Care!
Splash-A-Mole: a small group of students hid and peak out through the holes of a cut tarp. The rest of the class all have water guns and a pool full of water to refill fast. Switch the group of students every minute or two. Best if you can have a water gun for each student. Many years ago, we started with only four and had lines that rotated using them. It was doable but found there was too much down time when refilling. Each year we add more if funds allow. This way we have some filling up, while the others are being used. I teach my students to unscrew the cap and push the water gun down into the pool of water, so it starts to fill up before they grab another one off the bottom of the pool. They screw closed the new gun and continue play. I have those large safety science goggles if students prefer to use them, some do, some don’t. I actually started attaching them to our large metal soccer field goals that don’t have nets on them. Seems to work better with the wind.
Hi there.
I was looking for 6 active stations for children ages 5 – 12 with learning disability with the theme of Superheroes for an indoor/outdoor sports afternoon please? So each class starts at 1 station then moves onto station 2 to do that activity.
Thank you
Looking for more information on building the car wash. I tried but failed more pictures please