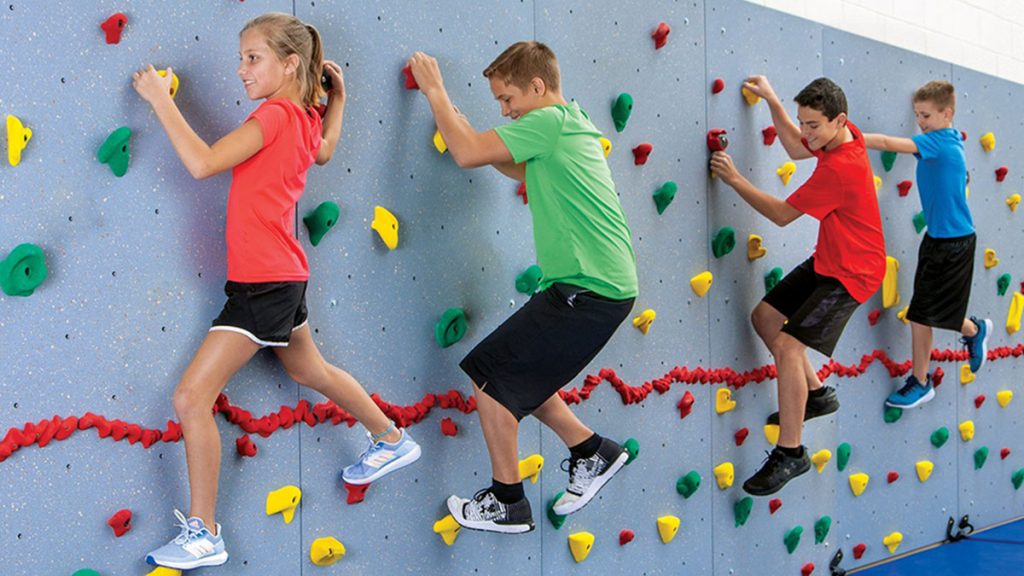
Before I became an elementary physical education teacher, I was a middle school health and physical education teacher. I had always dreamed of being an elementary physical education teacher and hoped the school I went to would have a traverse wall. I am very fortunate the school I am with now has one. Students participate in activities that include the traverse wall in our adventure games unit. For us, this unit takes place in December or January. I taught this unit between Thanksgiving and Christmas break when I knew the students would be the most excited to move! In this blog, I am sharing safety rules, basic information, and activities to try with a Traverse Wall. I hope you find it useful!
Safety Rules:
- Do not wear any loose clothing or jewelry. This could cause an injury as the loose clothing could get into the way of your hand or feet placements. Jewelry such as bracelets or necklaces could get caught on the rocks this can cause injury or damage to the item.
- Each panel has a safety mat. There should only be one student per panel when climbing. This eliminates risk of students causing injury to themselves or others.
- Students should not at any time or climb under or over anyone.
- Do not jump off the panels onto the safety mats.
- No one should climb at anytime above the red relief line. This red line looks like red paste going horizontal down the wall. A student’s feet should always be below this line.
- Students should always be supervised when climbing the wall.
- Be consistent and firm with the rules.
- Lock the mats back onto the hooks after each use.
Climbing Basics
- Before using the traverse wall, check to see if there are any loose bolts. Checking the bolts will let you know if the wall is safe for your students to climb. If there is a section of the wall or a few rocks that are loose, have them fixed before use.
- ULTRAVERSE Traverse Climbing Wall has 3 different rock colors, each one has a different meaning. I explained the different meanings of the rocks to my students in video game terminology. Try to explain it in terms that are relevant! You will earn some cool teacher points!
- Green = Beginner
- Yellow = Intermediate
- Red = Hard
- The red relief line is the horizontal red line on the wall. This line indicates when students should stop climbing the rocks with their feet. Below the line rocks are for feet and rocks above the line are for hands only. Be very firm when explaining this. If a student climbs above the line have them safely get down and watch their peers. Explain why it is important for them to not climb above the red relief line.
Activities
Once everything is checked for safety and students have been given the safety rules, you can begin to climb. Below are some activities I did this school year.
- Pre-k- Kindergarten: For my primary grade levels, I had opened 3 panels. After discussing in detail, the basics and safety rules, 3 students at a time could climb the wall. We only focused on vertical climbing at this time. Some students were very shy. Having myself and 1-2 IA’s available to assist really helped them become more comfortable.
- 1st– 2nd: First and second grade students were introduced to the wall and played a game called, “How the Grinch Stole Fitmas!”. In this game I used the wall as Mt. Crumpit. The wall was a part of the Grinch’s territory and he had stashed away the Who’s stolen presents on the mountain. Students could climb horizontally or vertically to take back the Who’s stolen items. The class with the most items won. My gym has 9 panels. You can take down as many panels as you would like for this game. I stashed bean bags on the climbing rocks above the red relief line.
- Math Intervention: When I taught math intervention to a second-grade group, I placed my poly spots with numbers on them on the wall. At the time the class we were learning double digit subtraction. Each student would climb the wall. Grab two numbers and complete their math problem. Once all the numbered poly spots were taken, we would reset. We were only together for 30 minutes and we did not get to reset often.
If you are interested in learning more information on using a traverse wall and different activities, I highly recommend watching the SPARK Traverse Wall 101 webinar that can be viewed on-demand for free. The presenter goes into detail about the wall, provides different activities, and shares a handout of the presentation.
If you have any activities, you would like to share please let us know in the comment section below! We look forward to hearing from you.
Related Article:
Climbing can be fun! by Cathryn Bass


